Creating still images really helps bring designs to life without having to create prototypes and can save companies a lot of money, however 2D images have their limitations. Here is when animations come into their own.
Visualize
Animation
Creating still images really helps bring designs to life without having to create prototypes and can save companies a lot of money, however 2D images have their limitations. Here is when animations come into their own.
SOLIDWORKS Visualize Professional has a few different tools, which make it quick and easy to create animations that both explain and bring your product into new realms of realism without having to create physical objects.
There are a few different animating tools but in this blog we will use a watch to illustrate how Visualize can animate cameras, scenes and models themselves to produce a movie of how the design works or is put together:
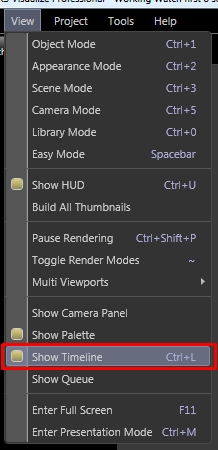
All animations use the timeline feature and use key frames that define the starting and ending points of any movement. This can be found in View > Show timeline or CNTL + L as a shortcut. A sequence of key frames defines which movement the viewer will see, whereas the position of the key frames on the timeline defines the timing of the
movement.
To follow what was shown in the video we will start off looking at cameras, then scenes then get on to animating your models. Finally we will look at the output options available.
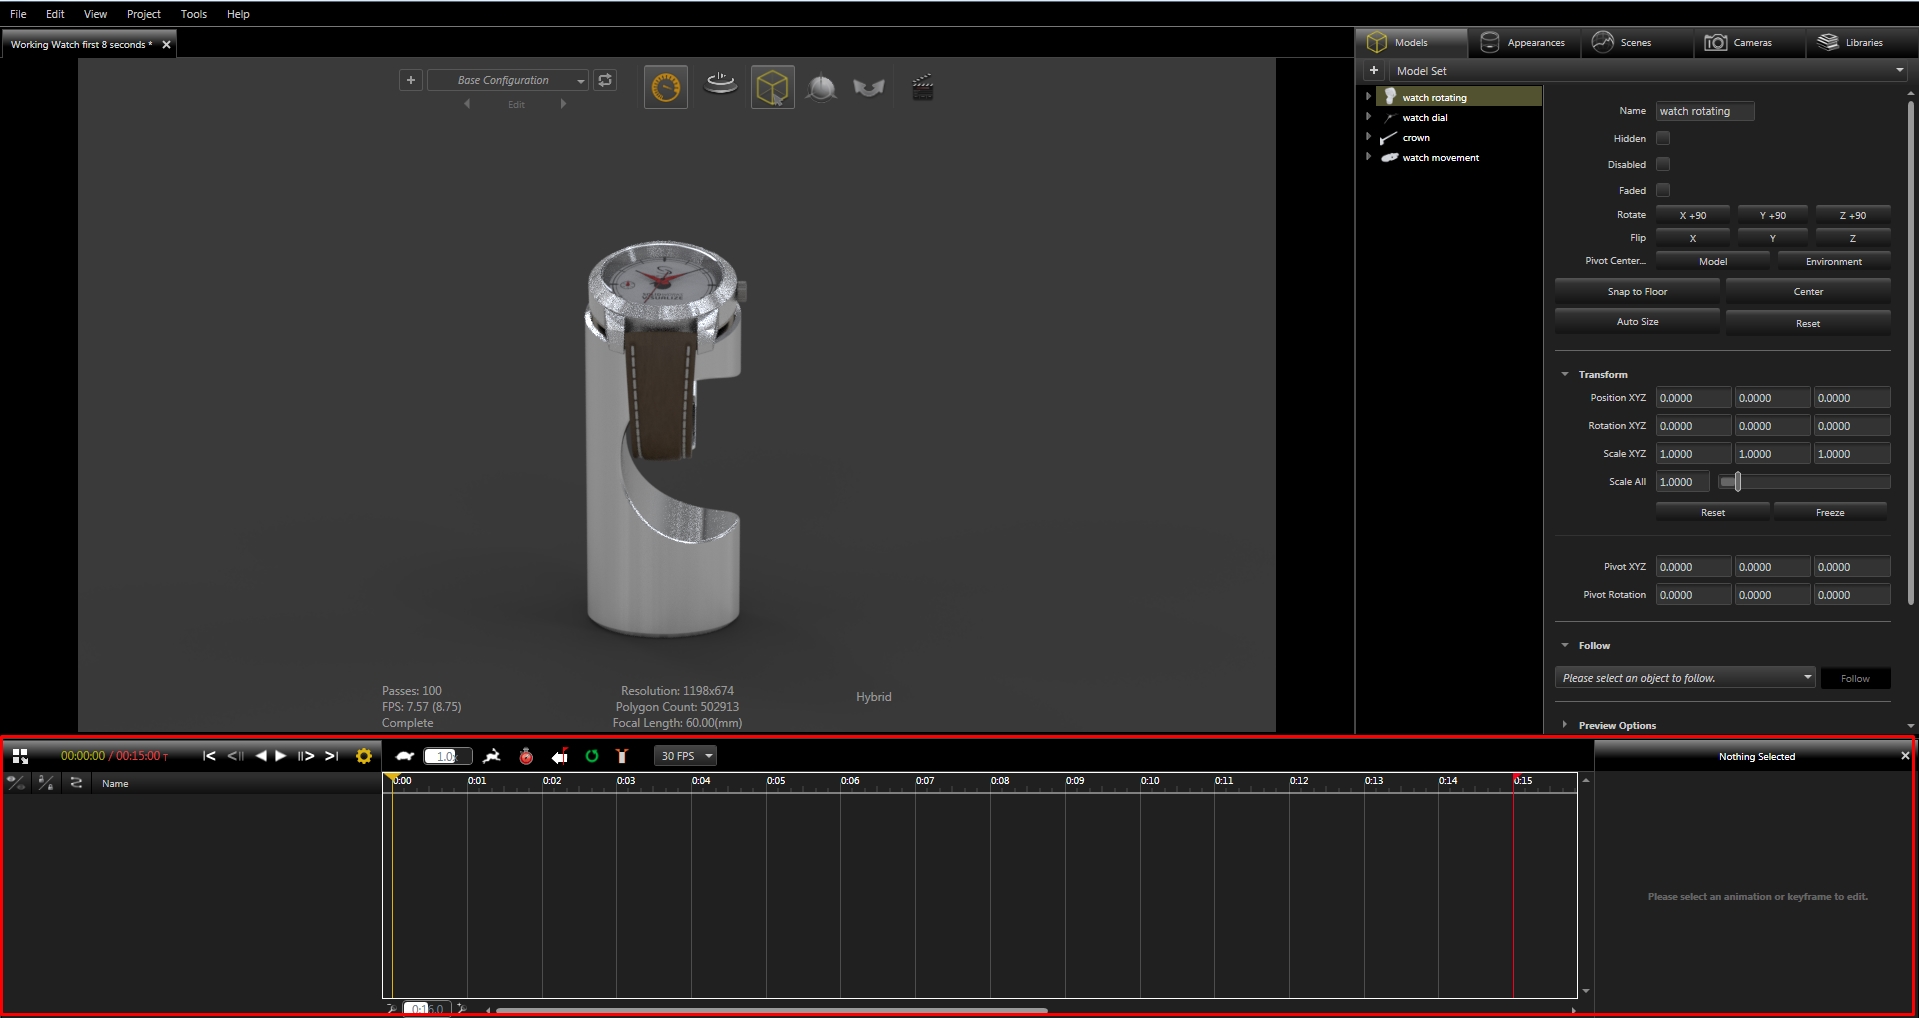
NOTE: The yellow flag indicates where you are in the timeline and the red flag is the length of the animation, both can be changed by simply clicking and dragging on the triangle.
Animating Cameras:
It
is always a good idea to have a camera that you will use for your animation and a camera that is free that you can move around view your model without worrying that it is messing up your view.
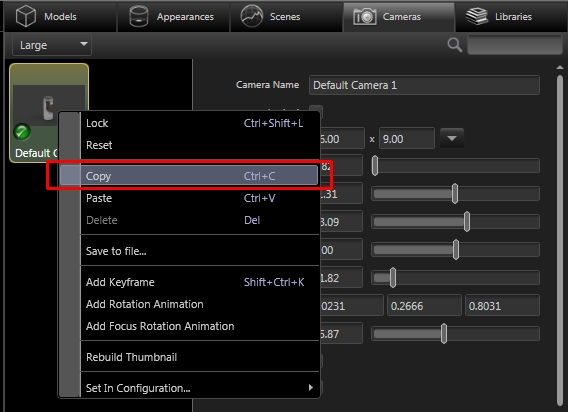
You
can do this by right clicking your camera in your camera tab and selecting copy followed by right clicking and selecting paste elsewhere in the tab. You can easily rename this camera to something like explode.
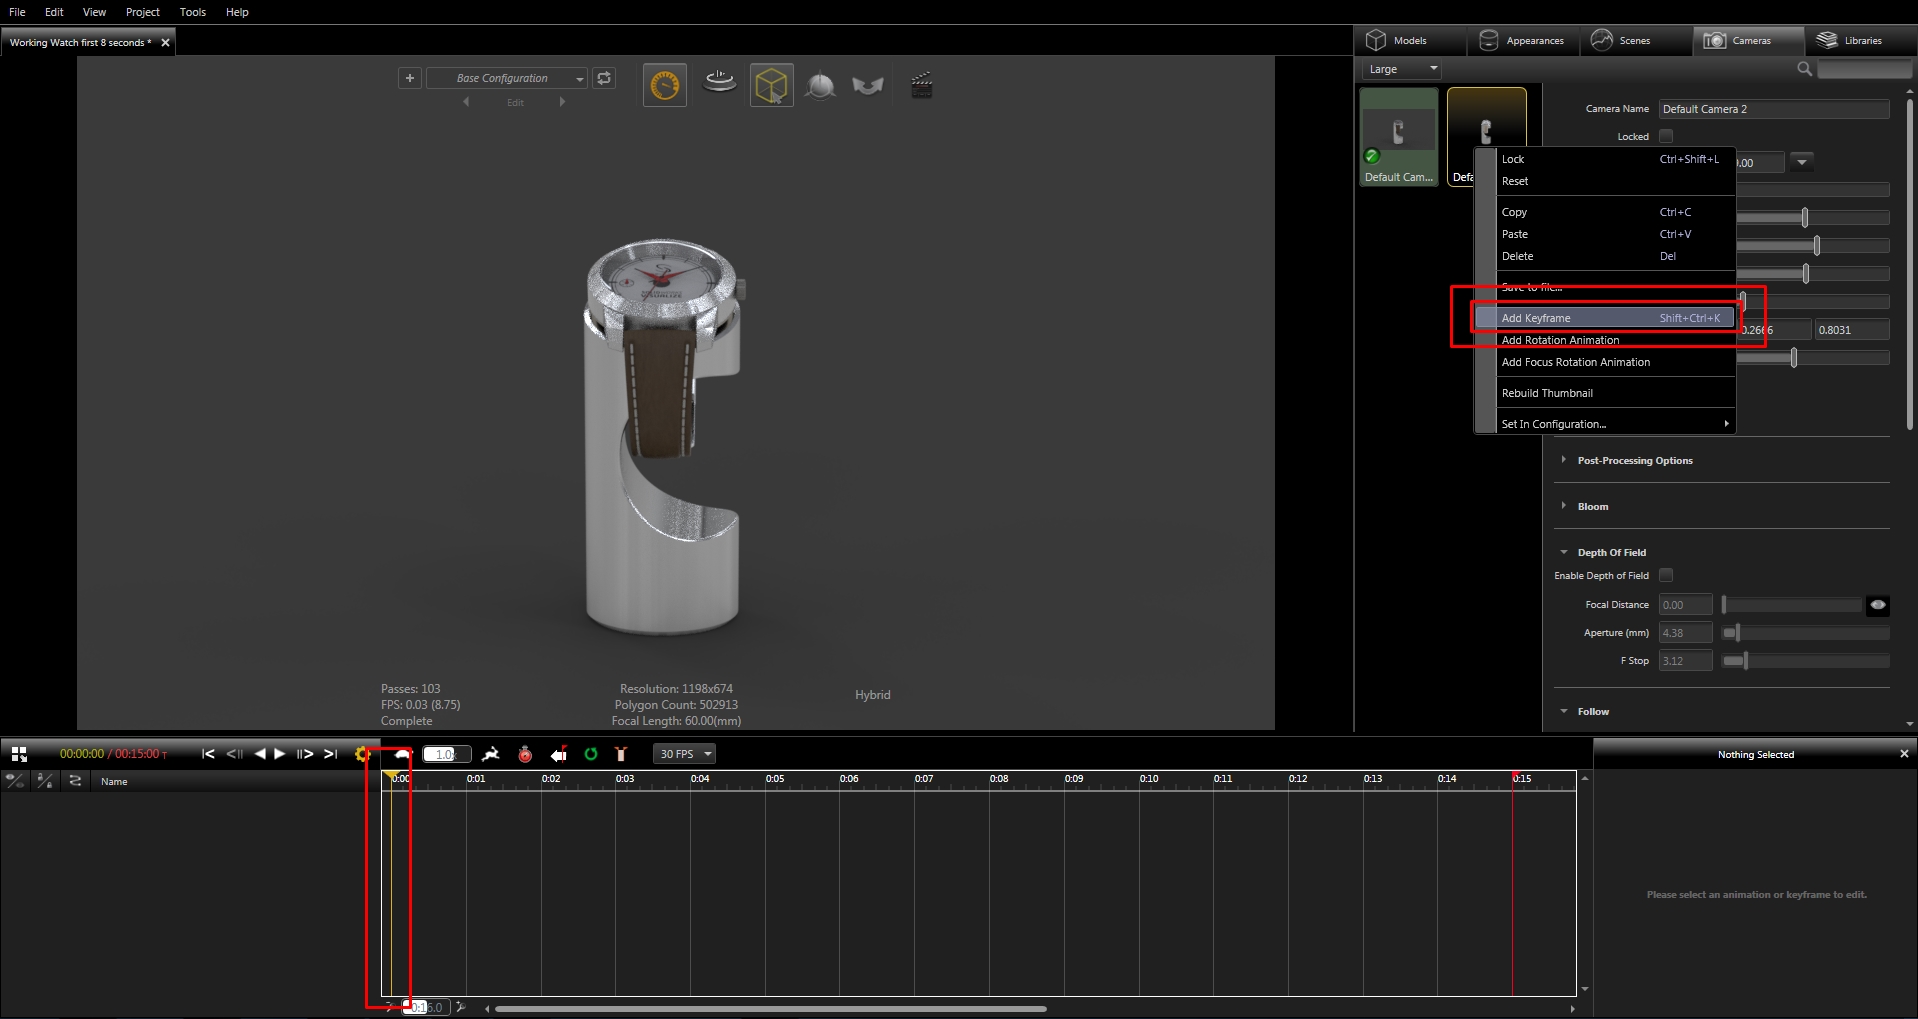
Once you are ready to animate your camera make sure the timeline, then right click on the camera and select ‘Add Key Frame.
For moving key frames you can use the ‘Auto-Key-Frame’ tool and then use your standard moving tools to get a different look at your model.
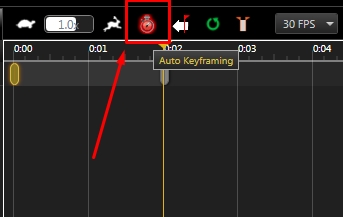
Animating Scenes:
The same method can be used for scenes. Moving scenes can mean that you get different reflections and shadows on your model and can bring it out of the background, especially if your design doesn’t move and has a reflective material applied.
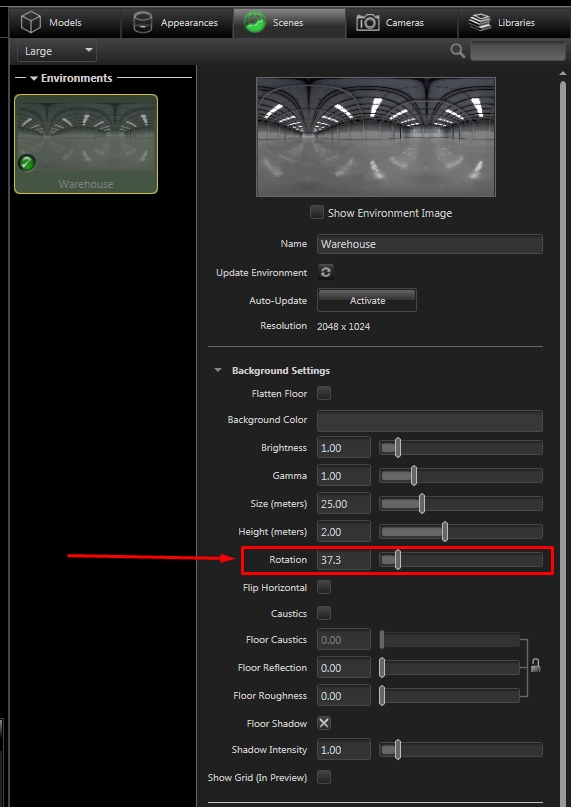
To
animate your scene, simply go to the scene tab and right click your chosen scene and choose ‘Add Keyframe’. One of the most useful scene animations is too rotate your scene so you get reflections that seems like the world going past.
This can be done by adding a keyframe, scrolling to a later time and while ‘Auto-keyframe’ is turned on, use the background settings > rotation to rotate your scene.
Animating Models:
NOTE: it is normally a good idea to have it in preview mode while animating as otherwise the pixelation means its hard to see what’s going on. Also make sure your model has an appropriate structure tree in order to make it easy to drag the parts you want around. If for instance you imported them with the appearance import then it will move everything with that appearance around rather than the individual parts.
If you want to show your models in exploded views or to show basic movement of parts then you can use key frames and the move tools to move parts of your model around. To perform this kind of movement, move the yellow flag to the appropriate time such a 0 seconds, in the ‘Models’ tab find the part you want to move > right click > add key frame.
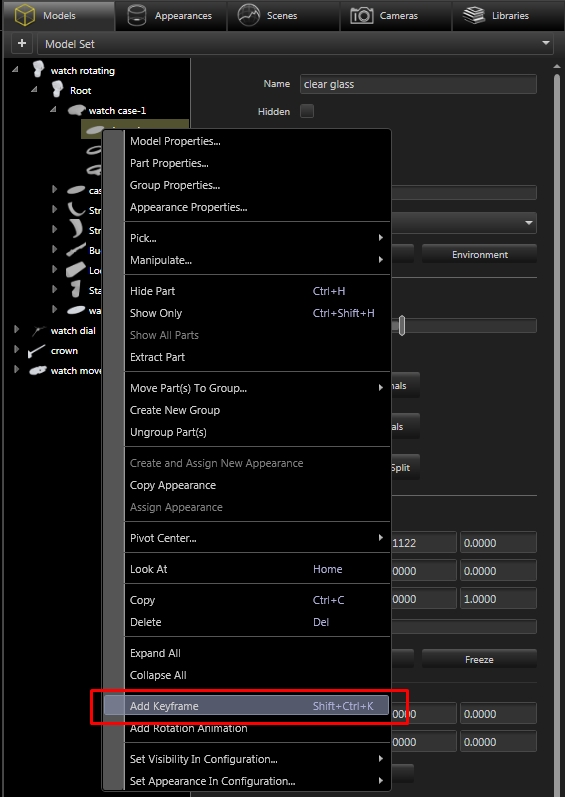
This adds the key frame at the time where your yellow flag was and puts a red dot on the part in the models tab so you know you have an animation attached to that part.
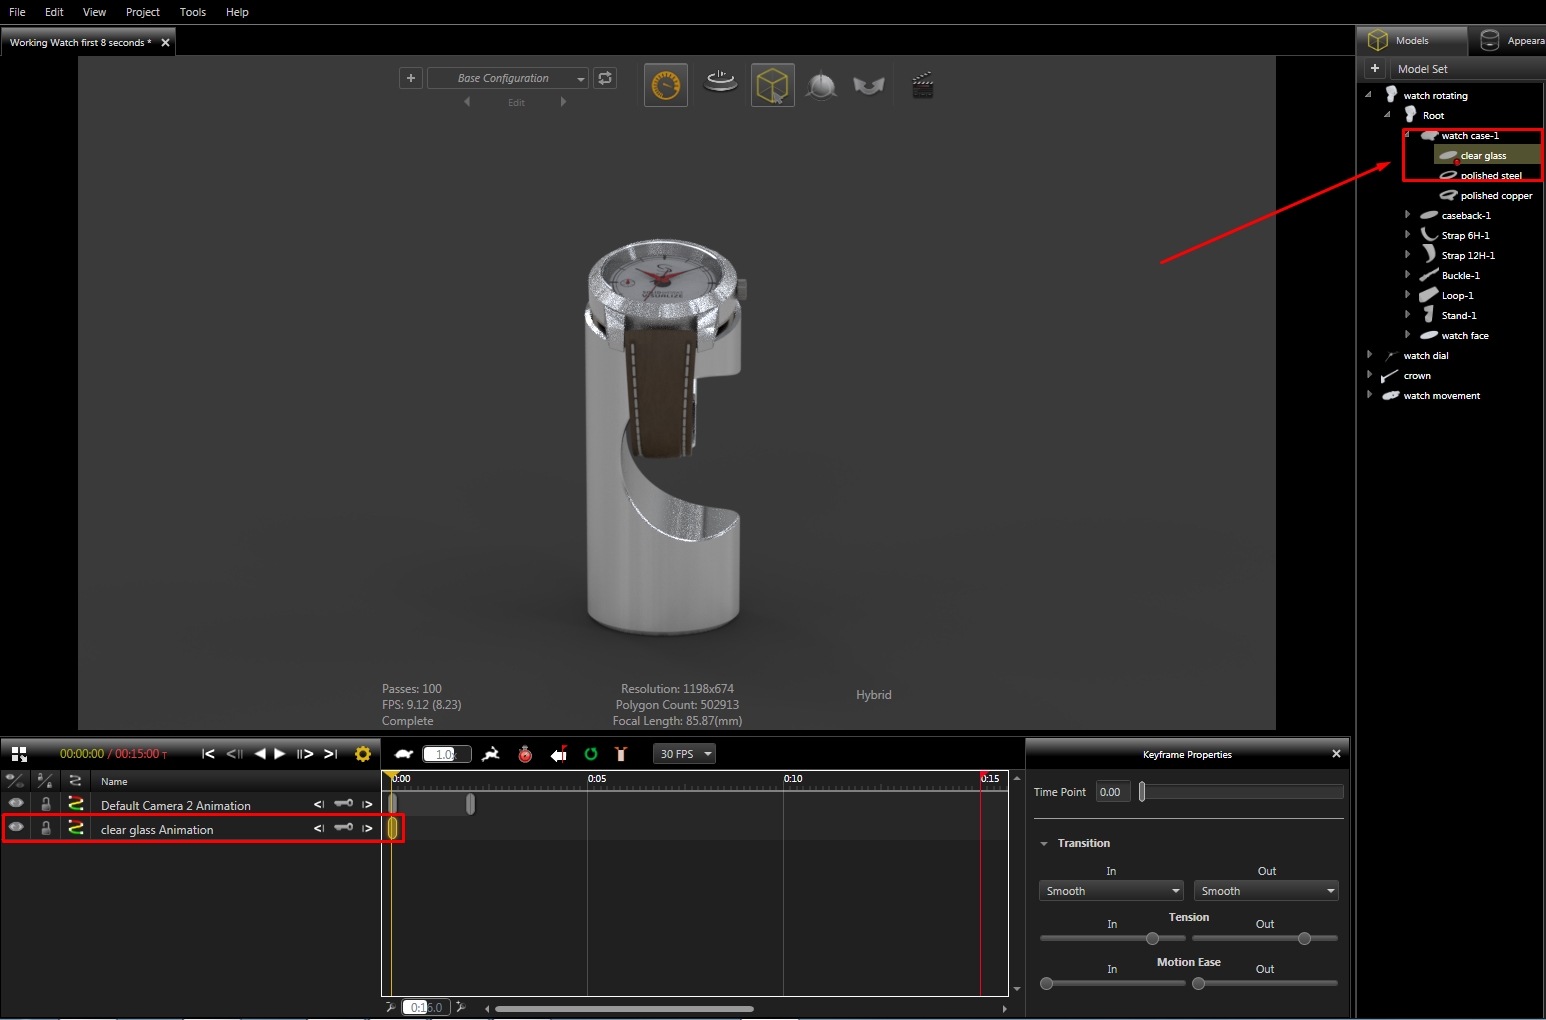
You then simply need to move to a new time, either making sure the Auto-keys setting is on or manually pressing the keys icon to add a new key frame and then use the move tools to move the part for that key.
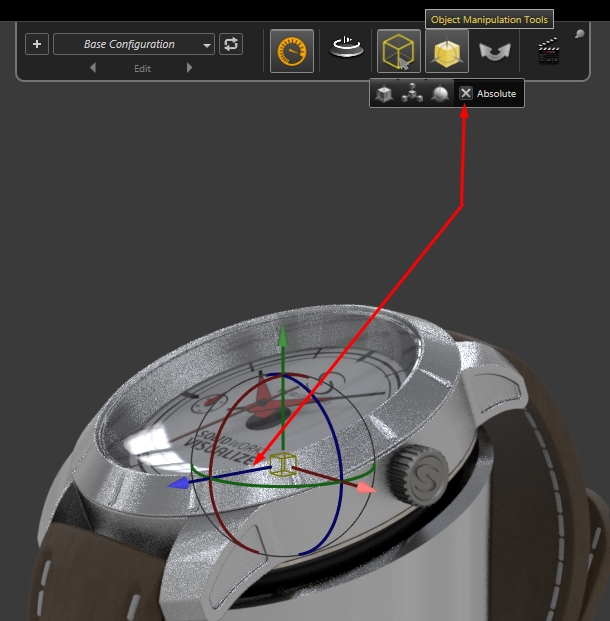
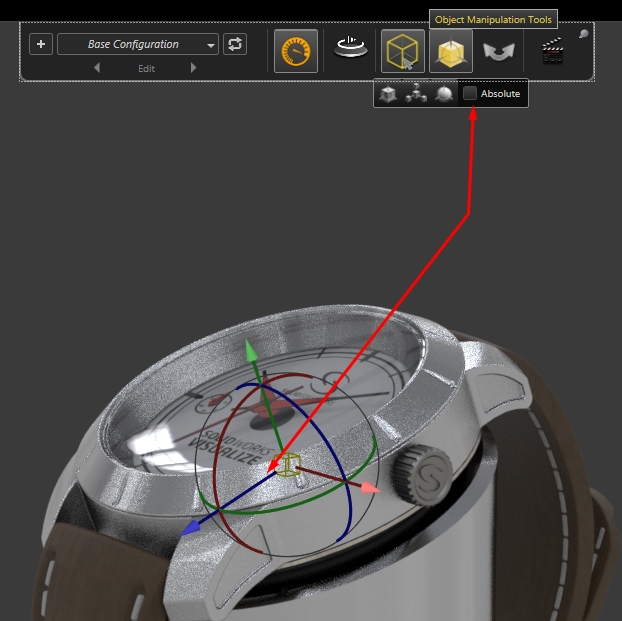
The move tools can be found at the top next to the selection tools. There is move, scale and pivot and a checkbox for absolute. The checkbox changes how you want to move the part; about the global coordinate system or about the parts coordinate system.

Output:

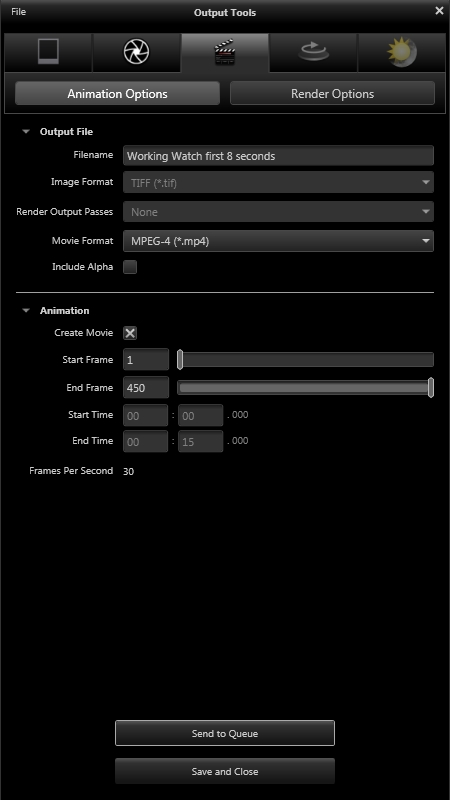
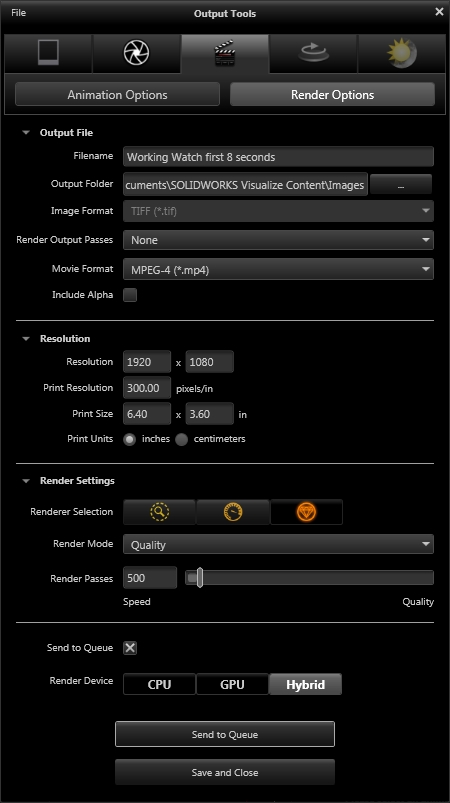
To output an animation you must specify ‘Animation’ (the film icon) in the render button. This brings up a dialogue with 2 tabs, ‘Animation Options’ (movie options and which frames to render) and ‘Render
Options’ (the standard render options where you set the quality and choose whether you want to render on the CPU/GPU or both).
By Chris Green
SOLIDWORKS Applications Engineer
Models edited from:
-
Kalle K -
https://grabcad.com/library/f360-demo-watch-1
- Steen Winther
- https://grabcad.com/library/eta-6497-1-complete-watch-movement