I spent some time recently walking around town trying to get a battery replaced in my watch. After the fourth jewellers shop failed to remove the back was resided to sending it back to the manufacturer for repair. That was until I walked past the 3d printer in the office one day and had the idea to design make the tools to do the job myself, so off I went!
I spent some time recently walking around town trying to get
a battery replaced in my watch. After the fourth jewellers shop failed to
remove the back was resided to sending it back to the manufacturer for repair.
That was until I walked past the 3d printer in the office one day and had the
idea to design make the tools to do the job myself, so off I went!
Challenges
The watch has a screw off back and one issue that most of
the jewellers come across was getting sufficient purchase on the watch to
generate the torque required to remove the back.
Using a multipurpose tool also caused the tool to slip of
the watch when more force was being applied, basically because it wasn’t a
perfect fit. This risked scratching the back of the watch case, but more
crucially prevented proper engagement with the watch and made it impossible to
remove the watch back.
Another
hurdle I had to overcome was the limitations of the print material. I would be
using ABS filament. Printed in pins thin enough to engage with the watch case,
the material would not be strong enough to withstand the forces required to
open the back, so I needed to look elsewhere.
Solution
Naturally I began with SOLIDWORKS. I took some measurements
from the watch case and started modelling up the tools. I wanted to create a jig
that would hold the watch in position when enough force was applied to remove
the back and a tool to apply the force without slipping.
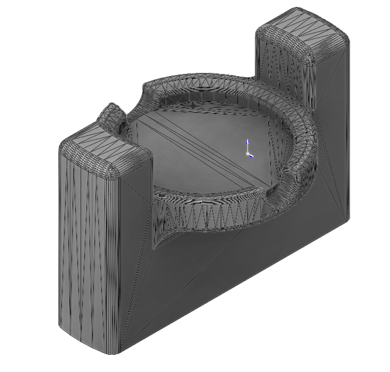
Holding Jig
For the holding jig, I made use of the shoulders of the watch
(I needed to remove the strap) as they were a solid fixed point that would
allow me to lever against. The rest was simply a case of allowing clearance for
the crown and making sure the watch glass was sufficiently protected by
allowing additional clearance so it wasn’t exposed to any pressure. Finally a block of material was extruded at
the base. The intention for this was to provide something to grip by hand or in
a vice if necessary.

The Removal tool
The tool itself was relatively simple. A pcd measurement was
taken from the watch and a series of holes patterned around the pcd to match
the points in the back of the watch case.
I found my solution for the pins in the form of some
stainless steel dowels from amazon.com. I wanted an interference fit between
the pins and the handle. The printer I used wasn’t accurate enough to warrant
specifying fit tolerances so I went with the nominal diameter of the pin (which
happened to work perfectly) but expected some fettling to get the pins
installed. The last thing was to add a handle to allow for sufficient leverage.
Having seen previous attempts with a steel tool fail, I went for something
quite chunky!

Design complete, it was ready for printing. I used
SOLIDWORKS to save my files to .stl format and loaded them into the 3D printers
processing software. When saving files for 3d printing it is important to save
to a resolution that best suits your 3d printer. Further information on this here.

My main consideration when nesting the parts was to ensure
the handle was facing upwards as this would ensure that there would be no
support material around the critical area where the holes would be (no fiddly
clean up afterwards), and that the holes would be printed as accurately as
possible.


Once printed the parts were removed from the bed and any
excess support material removed. With a little persuading the pins were
inserted and the tool was ready to go!

Installing the
battery

I removed the strap, sat the watch case in the jig, lined
the pins up with the watch case and twisted the back off with no problems.

From this point it was a case of replacing the battery,
giving the surfaces a clean and re-installing the watch back and strap.

Costing
Pins £4.20
Battery £2.50
Material 175g approx. £3.50
Total £10.20
All in all the DIY method was a similar in cost to having it
replaced in a jewellers, but significantly less than sending it off to be
replaced at the manufacturer!
3D Printing is becoming an increasingly popular method of
producing jigs and fixtures for manufacture. It allows for extremely quick
production of parts at relatively low cost compared to the machining of low
volume one off components. It also allows for the creation of impossible
geometries which can’t always be achieved using traditional manufacturing
methods allowing you to get creative!!


Nick Jones
SOLIDWORKS Application Engineer
